You will probably never see made-from-scratch curry paste featured as a 30-minute meal from Rachel Ray. We can live with that. Yes, it takes a long time. But curry paste made at home has a fresh taste you will never get out of a can, or probably at most restaurants. Double the portions and save what remains in the freezer to make your efforts worthwhile. The following entry contains recipes for green curry paste, jasmine rice, and green curry (cooked with meat or vegan style). We've adapted these recipe from a wonderful cookbook called
True Thai.
 Green Curry PasteIngredients
1/2 tablespoon whole coriander seeds
1/2 teaspoon whole anise (fennel) seeds
12 whole white peppercorns
2 and 1/2 teaspoons minced fresh Kaffir lime or domestic lime peel
1/3 cup chopped cilantro stems
2 stalks lemon grass. Tough outer leaves discarded, chopped
1/3 cup finely chopped fresh ginger
1/4 cup chopped garlic
1 cup chopped shallots
1/2 cup sliced serrano chilis
6 leaves romaine lettuce (for color)
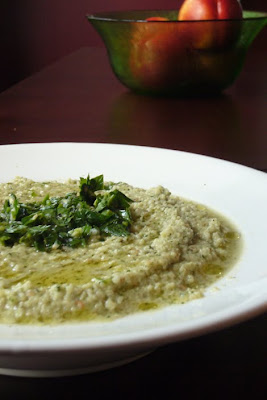
InstructionsRoast the coriander and anise seeds in a dry pan over medium heat for 5 minutes, until fragrant. Crush with a mortar and pestle (or in a plastic bag with something broad and heavy). Mash the rest of the ingredients in batches in a mortar and pestle to break down the fibers, then blend in a food processor until smooth.
Jasmine RiceRun cold water over 1 cup of jasmine rice in a mesh strainer until it comes out clear. Mix the rice with about 1.5 cups cold water in a small pot, then bring to a rolling boil. Cover, reduce heat to low, and cook for 18 minutes. Remove from heat and let rest 10-30 minutes.
Green Curry (meat version) Ingredients1 cup green curry paste
18 ounces coconut milk
1-2 tablespoons light brown sugar
fish sauce
2 chicken breasts, chopped into bite-sized pieces
2-3 cups vegetables (e.g., green pepper, green beans, japanese eggplant), sliced
handful of thai basil
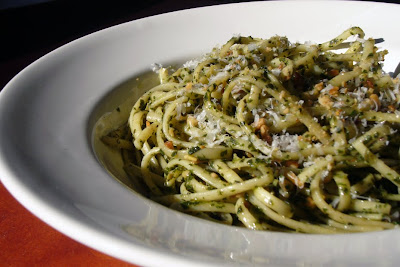
InstructionsMix curry paste with the coconut milk in a fairly large pan over medium heat to a low boil. Add the chicken and cook on a low boil for 3 minutes. Add a few dashes of fish sauce and the sugar, and stir until blended. Add the vegetables and cook another 3-4 minutes until they have softened to your liking. Turn off the heat, add plenty of thai basil, and serve over jasmine rice.
Green Curry (vegan version)Ingredients 1 cup green curry paste
18 ounces coconut milk
1-2 tablespoons light brown sugar
soy sauce
1 box firm tofu, place on a paper towel to let excess water run out, then sliced in to cubes
2-3 cups vegetables (e.g., green pepper, green beans, japanese eggplant), sliced
handful of thai basil
InstructionsMix curry paste and coconut milk and bring to a low boil over medium heat. Add a few splashes of soy sauce and brown sugar and mix well. Add vegetables and cook to your desired tenderness. Add tofu and mix thoroughly. Turn off heat, add a handful of thai basil and serve over jasmine rice.