Tuesday, December 29, 2009

Pita Bread

Haifa's dad makes the best pita. We left Thanksgiving vowing never to buy them again (except from Pita Inn). This recipe is adapted from thefreshloaf.com.


Ingredients (makes 8 pita)
3 cups white flour
0.5 cup wheat flour
1.5 - 2 teaspoons salt
1 Tablespoon sugar
1 packet active dry yeast (or, if from bulk, 2 teaspoons yeast)
1 1/4 to 1 1/2 cups water, about 115 degrees fahrenheit
2 tablespoons olive oil

Instructions
Mix the water, sugar and dry yeast. Stir and let sit for about 10 minutes, until it starts to foam a bubble. Mix the yeast mixture with the flour, salt, and olive oil. Work the dough for about 10 minutes in a mixer or with your hands. Lightly coat a bowl with olive oil, place the dough ball inside coating it with some oil, and cover with a damp cloth. Let it rise until doubled in size, roughly 90-120 minutes.

Near the end of the rise, preheat the oven to 500 degrees fahrenheit. This recipe works best with a baking stone. You could also use an inverted cookie sheet. Either way, make sure your baking surface preheats with the oven.

When the dough has doubled in size, punch the dough down to release some of the trapped gases and divide it into 8 pieces. Roll each piece into a ball, cover the balls with a damp kitchen towel, and let them rest for about 30-60 minutes. This step allows the dough to relax so that it'll be easier to shape.

After the dough has relaxed, spread a light coating of flour on a work surface and place one of the balls of dough there. Sprinkle a little bit of flour on top of the dough and use a rolling pin or your hands to stretch and flatten the dough. You should be able to roll it out to between 1/8 and 1/4 inch thick. Repeat with the other pieces and let rest for another 30 minutes.

Place a few pita on the stone and bake. They should puff up in a couple of minutes. Let them bake 30 - 60 seconds after they have puffed. The steam inside will continue to cook them after you take them out.


Pita can be stored wrapped in a towel inside a plastic bag for several days.

Monday, December 21, 2009

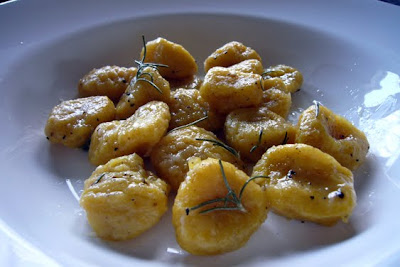
Butternut Squash Gnocchi

Substituting butternut squash for potato in this gnocchi recipe gives it something extra and made this a holiday-themed meal in November. The sweetness of the squash definitely complimented the wine sauce and rosemary. And obviously the melted butter didn't hurt.

butternut squash gnocchi
Ingredients
Gnocchi
1 butternut squash, peeled and seeds removed, cubed
2 tsp extra virgin olive oil
2 cups all-purpose flour, plus extra for dusting
1 cup parmesan
2 egg yolks
1/2 tsp ground nutmeg

White wine butter sauce
4 Tbsp butter
1 sprig rosemary
2 Tbsp chardonnay
salt & pepper

Instructions
Preheat the oven to 350. Place the squash on a baking sheet, drizzle with the olive oil and salt. Roast in the oven for about 35 minutes, turning once. Remove from the oven and set aside to cool. Transfer to a food processor and pulse.

In a bowl, combine the squash puree, flour, cheese, egg yolks and nutmeg and mix to form a dough. Knead the dough and form into a ball. Break a piece of dough off the ball and roll it into a 1-inch thick rope. Replenishing the flour on your board and hands when necessary, continue to form ropes until you have used up the dough ball. Using a knife, cut each rope into 1-inch pieces. Make thumb prints in each piece of gnocchi so they cook evenly.

Meanwhile, bring a pot of water to a boil.

Next, melt the butter in a pan over medium heat. Add the rosemary and wine, cook until the wine has boiled off, but do not allow the sauce to brown.

When the water is at a rolling boiling, add the gnocchi and boil until the gnocchi rise to the surface, about 3 minutes. Remove using a slotted spoon, holding them over the pot until they have thoroughly drained (you may have to do this in batches), then add gnocchi directly to the butter sauce. Season with salt and pepper and toss to coat with the sauce. Garnish with a bit more cheese and serve.

Soft Pretzels with Sea Salt & Poppy Seeds

These pretzels are so yummy that we made them twice in one week. We'll be making them again for the whole family in Ohio this Christmas. Can't get enough.

homemade soft pretzels
Ingredients
2 c warm water
3 T sugar
2 1/4 tsp active dry yeast
5-6 cups flour, plus more for dusting
1 T salt
2 tsp vegetable oil
1/4 c baking soda
1 large egg
coarse sea salt
poppy seeds

Instructions
Pour warm water and 1 tablespoon sugar into bowl of electric mixer fitted with a dough hook and stir to combine. Sprinkle with yeast, and let it sit for 10 minutes until it becomes foamy.

Add 5 cups of flour and salt to the yeast mixture, and mix on low speed (still using the dough hook) until it forms a nice dough (usually takes about 10 minutes). If you find that the dough looks wet and too sticky, slowly add in more flour until the dough doesn’t stick to the mixing bowl.

pretzel dough in mixer
Pour oil into a large bowl and use a paper towel to spread it evenly. Transfer dough to bowl, turning dough to completely cover all sides with oil. Cover with saran wrap or a towel, and let it rise until doubled in size.

Heat oven to 425 degrees. Line two baking trays with parchment paper. Set aside.

Once dough has doubled in size, punch dough down (gently). Divide into 12 even portions, and let this rest for 5 minutes – this makes it easier to roll out and shape the pretzels.

Roll each piece of dough into a foot long strip. Allow each strip to rest again and then twist this into the shape of a pretzel and transfer to the baking sheet.

Once all the pretzels are formed, leave to rise on baking sheets for 10-15 minutes.

Meanwhile, fill a large pot with 2 inches of water, and bring it to the boil. Add baking soda and remaining 2 tablespoons sugar. Reduce to a simmer. NOTE: Do not use a Calphalon non-stick pan to do this!! The baking soda will have a chemical reaction and cause the non-stick to boil away leaving you with poisonous pretzels. Yes, we made this mistake once and probably shaved 10 years off our life.

Transfer two pretzels to the water and poach for 1 minute on each side, and then remove with a slotted spoon. Put pretzels back on baking sheet. Continue until all pretzels are poached.

Beat egg and brush pretzels with egg glaze. Sprinkle with coarse sea salt & poppy seeds.

Bake pretzels until golden brown, 12-15 minutes. Cool on wire rack.

Cinnamon Crumble Apple Pie

apple pie
Ingredients
Crust
1 1/3 cups all purpose flour
1/2 teaspoon salt
1/2 teaspoon sugar
1/4 cup (1/2 stick) chilled unsalted butter, cut into 1/2-inch cubes
1/4 cup frozen solid vegetable shortening, cut into 1/2-inch cubes
3 tablespoons (or more) ice water
1/2 teaspoon apple cider vinegar

Filling
3 1/4 pounds Granny Smith apples, peeled, cored, sliced 1/4 inch thick
2/3 cup sugar
2 tablespoons all purpose flour
2 teaspoons ground cinnamon
2 tablespoons unsalted butter, melted

Topping
1 cup all purpose flour
1/2 cup sugar
1/4 cup (packed) golden brown sugar
1 1/2 teaspoons ground cinnamon
1/2 teaspoon salt
6 tablespoons chilled unsalted butter, cut into 1/2-inch cubes

Instructions
For crust:
Mix flour, salt, and sugar in large bowl. Add butter and shortening; rub in with fingertips until coarse meal forms. Mix 3 tablespoons ice water and vinegar in small bowl to blend. Drizzle over flour mixture; stir with fork until moist clumps form, adding more water by teaspoonfuls if dough is dry. Gather dough into ball; flatten into disk. Wrap in plastic; refrigerate 30 minutes.

Position rack in center of oven and preheat to 400°F. Roll out dough on lightly floured surface to 12-inch round. Transfer to 9-inch-diameter glass pie dish. Trim overhang to 1/2 inch; turn edge under and crimp decoratively. Refrigerate while preparing filling and topping.

For filling:
Mix all ingredients in large bowl to coat apples.

For topping:
Blend first 5 ingredients in processor. Add chilled butter cubes; using on/off turns, cut in until mixture resembles wet sand.

Toss filling to redistribute juices; transfer to crust, mounding in center. Pack topping over and around apples. Bake pie on baking sheet until topping is golden, about 40 minutes (cover top with foil if browning too quickly). Reduce oven temperature to 350°F. Bake until apples in center are tender when pierced and filling is bubbling thickly at edges, about 45 minutes longer. Cool until warm, about 1 hour. Serve with vanilla ice cream.

Vanilla Cream Cheese Sugar Cookies

vanilla sugar cookies
Ingredients
1 cup butter, softened
1 cup sugar
3 oz cream cheese, softened
1 tsp vanilla extract
1/2 tsp salt
1 egg yolk
2 1/2 cup flour
1 egg white
sanding sugar, for decorating

Instructions

Preheat oven to 350 degrees

In the bowl of an electric mixer, cream together butter, sugar, cream cheese and vanilla. Once fluffy add the salt and egg yolk. (Reserve egg white in a bowl for later. I stuck mine in the fridge to be safe.)

Add flour to mixer and mix until just combined. Do not over mix.

Wrap the dough in plastic wrap and refrigerate for at least 30 minutes to an hour before rolling. The colder the dough the easier it is to roll out because it is extremely soft!

Flour a clean surface and flour your rolling pin. Divide dough into 4 sections (chill sections you are not rolling) and roll each section to a 1/4 inch thickness. Use your favorite cookie cutter.

Dust the flour off the cookies and place on a prepared cookie sheet. Whisk the egg white and brush an egg white glaze on each cookie. Sprinkle with sanding sugar.

Bake for 8 minutes and then let cookies cool for 1 minute before moving to a rack.

Monday, August 31, 2009

Spicy Chili-Infused Olive Oil

This special middle eastern recipe comes to the blog courtesy of Haifa's dad. Spicy red chilis are drained of their moisture before they release their flavor and heat. The result is an olive oil that enlivens just about everything from hummus to grilled meat.

Spicy chili-infused Olive Oil

Ingredients
1 cup fresh red chilis (we used thai chilies, but peperoncini or any very hot variety will do
salt
olive oil

chili peppers

Instructions
Using rubber gloves, remove the stems and puree the chilis in food processor until roughly chopped. Using a spatula, move the chili mixture to a mesh strainer and sprinkle generously with salt (see below).

strain chilis

Put something wide and heavy (e.g., a container filled with water) directly on the chilis, then pace the strainer over a bowl in the refrigerator. Let sit for 2 days to allow any water to drain from the chilis. Move the chilis to a small container and cover with about half an inch or more of extra virgin olive oil. Stir the mixture every so often for a couple of days to let the flavors blend. As you use the oil, be sure to add a bit now and then to prevent mold from forming.

chilis draining

Thursday, August 27, 2009

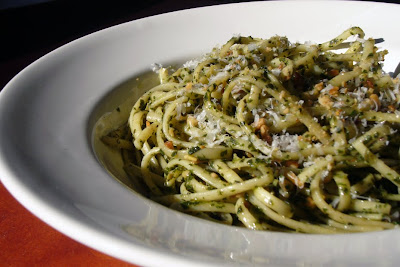
Pesto

We eat this classic Ligurian sauce with linguine at least once a month. There really isn't a "recipe" for pesto, just a few basic ingredients. Because of this, the quality and proportions of the ingredients are the limiting factors. Use the freshest basil, olive oil, and cheese possible, and experiment with different amounts of each ingredient as you build the sauce. Each batch will be different than the last, and this variability is what makes pesto special.

pesto pasta

Ingredients
2 1/4 cups tightly packed basil leaves, washed and dried thoroughly
2 cloves garlic
about 1/3 cup extra virgin olive oil
sea salt
freshly cracked black pepper
about 1/4 cup pine nuts
parmiggiano-reggiano (or grana padano) cheese
linguine (or any type of pasta), fresh if possible

Instructions
Toast the pine nuts over medium heat until golden brown. Be careful as they near the end of cooking, as they tend to burn quickly. Crush with a mortar and pestle, or with the back of a knife, and set aside.

Puree the basil, 1/4 cup of olive oil, and garlic in a food processor. Add more olive oil, salt, and pepper in small increments, tasting after each addition, until the sauce tastes good to you. Remember to make it a little stronger than you think is necessary, because it will be somewhat diluted when you add the pasta. Also, be careful not to add too much oil. If you do, the sauce doesn't absorb into the sauce quite as well. Pour into a deep bowl and mix in the nuts. Some recipes recommend blending the nuts with the sauce, but we prefer to add them later to preserve their texture.

Boil your pasta until al dente. Move about a tablespoon of the cooking water to the bowl of pesto before you drain the pasta. After well drained, add the pasta to the pesto and top with an extremely generous portion of grated parmiggiano-reggiano cheese and mix until pasta is coated.

The easiest way to improve your pesto is to use high-quality olive oil. In fact, a good (and usually expensive) bottle of olive oil is always good to have around to supplement a less expensive bottle used for cooking. We started using Palestinian oil and haven't looked back.

If you are really serious about pesto, you can use a mortar and pestle instead of a food processor. Crushing each leaf by hand breaks down the fibers and tends to make a more flavorful sauce. But be warned, you might be too tired to eat by the time you are done.

Tuesday, August 25, 2009

No-Knead Bread

This bread is a miracle. You get an outstanding loaf for nothing more than the price of some flour, salt, and yeast. And as the recipe says, you don't have to knead the dough. The only catch is that you have to plan in advance to accommodate the 18-hour rise time. Well worth it.

no knead bread

Ingredients
2 cups all purpose flour
1 cup whole wheat flour
1 1/4 teaspoons sea salt
1/3 teaspoon active dry yeast, or 1/4 teaspoon instant yeast

Instructions
Mix the flour, sea salt, and yeast in a large bowl. Add 1 and 5/8 cups room temperature spring water. Mix with a spatula until a shaggy ball forms. Cover the bowl with plastic wrap and let the dough rise for 8-18 hours. You know it is ready when bubbles form on the surface.

Dust your countertop and hands with flour. Move the dough to the counter and fold over on itself a couple of times. Place the dough, folded side down, on a cotton towel dusted with plenty of flour. Then place another floured towel over the other side. Make sure the towels aren't terry cloth, and that you use a lot of flour to prevent the dough from sticking. Let rise another 2 hours.

Half an hour before the two hours has passed, heat your oven to 450 degrees fahrenheit with a 3-8 quart heavy covered pot inside. We used a cast-iron dutch oven coated with porcelain, but an enamel, pyrex, or ceramic pot should work too. When heated, remove the pot from the oven and gently place the loaf in the pot, folded side down. Cover and bake 30 minutes. Remove the lid and bake 15-30 minutes more, until a nicely browned crust forms (15 minutes was enough for us).

This is the dutch oven we used (anything from 3 to 6 quarts is fine):
Lodge 6-qt. Enameled Color Enamel Round Dutch Oven, Blue

**The New York Times No Knead Bread Recipe called for rapid rise yeast, but dry active yeast works well if you use more.

Lemon Slices in Olive Oil

This is the first recipe that we have tried from a book called Mediterranean Hot and Spicy, by Aglaia Kremezi. You can chop up the lemon peel and mix it with a salad or even eat it by itself! And the oil should take on the flavor of the lemons and work well in dressings or marinades, or wherever "preserved lemons" are called for. If nothing else, you will have a cool looking jar on your countertop. It stays fresh 3-6 months in the fridge, but we have it out at room temperature for now to let the flavors develop. So yes, we haven't even tasted it yet.

lemons in spicy olive oil

Ingredients
3-4 lemons
4-6 tablespoons sea salt
2-3 dried chilis
extra virgin olive oil

Instructions
Wash the lemons and dry thoroughly. Slice them 1/8 of an inch thick, placing the slices in a colander. Sprinkle the first layer very generously with salt. Form new layers of lemon slices and salt until you run out of both. Place the colander over a bowl in the refrigerator and let the moisture drip out of the lemons. After 24 hours, place the lemon slices on a couple paper towels and carefully press down with more towels to extract most of the remaining moisture. Cut the chilis with a pair of scissors almost up to the stem. Layer the slices in a large jar, placing the peppers in between a couple of the slices. Cover the lemons completely with extra virgin olive oil. It should take some time for the flavors to mix, maybe even a couple of weeks.

Mediterranean Hot and Spicy

Thursday, August 20, 2009

Sauteed Shrimp with Parsley and Garlic

Few meals offer so much reward for so little effort. We always order sauteed shrimp when we go out for tapas, but it tastes even better when you make it at home!

sauteed shrimp

Ingredients
1 lb shrimp
2 cloves garlic
2 tablespoons chopped fresh flat-leaf parsley
2 tablespoons extra virgin olive oil
red pepper flakes (optional
lemon juice (optional

Instructions
Mash the garlic in a mortar or with the back of a knife. Combine with the parsley.
If the shrimp still have their shells, you may prefer to remove them. If you do, you may also like to de-vein the shrimp by making a shallow incision along the bottom where you might see a dark line (see image below). Remove the digestive tube. This isn't necessary, but who want shrimp feces in their dinner? Not us. Pat the shrimp dry with a paper towel.

Heat the olive oil over high heat in a large non-stick pan. When the oil is very hot, add the shrimp and stir occasionally for 2-3 minutes. They are just about done when they turn pink. Add the garlic and parsley and cook for another minute. You may also want to add a pinch of red pepper flakes at the end of cooking. Serve immediately with fresh lemon juice.

deveining the shrimp

Shrimp purchasing advice
Almost all shrimp is frozen immediately after being caught. So-called "fresh" shrimp at the grocery store is most likely shrimp that used to be frozen and has been sitting around all day (or maybe even longer). So unless you live on the coast, you might as well buy it frozen and thaw it yourself. The price should be the same. If you are buying frozen shrimp, make sure they were individually quick frozen (IQF), and that the bag contains no other ingredients than shrimp. Shrimp are often given ambiguous names like "jumbo" and "large." The best way to know their size is to check the number on the bag.

U/12: Super-colossal
U/15: Colossal
16/20: Super-jumbo
21/25: Jumbo
26/30: Extra-large
31/35: Large
35/40: Medium
40+: Cocktail

Most shrimp sold in America come from tropical waters like the Gulf of Mexico. White and pink shrimp are usually considered to be the best. Brown shrimp are popular as well.

Learn everything you need to know about seafood in this book... we did!
Fish & Shellfish


Rick Bayless is unbeatable

Although this isn't a recipe - I just wanted to see if anyone caught the finale of Top Chef Masters last night. As we expected Rick Bayless was announced the winner! Was there ever any doubt? We've written about several Rick Bayless recipes on the blog (with more to come) and I wanted to point out specifically which ones are his:

Two different recipes for salsa verde one using raw serrano chilis, and one with roasted dried red chilis.

Guacamole is always good, but this is the best we've ever had.

Tim made me steak and plantains on the grill for our first Valentine's dinner. We've used this spice rub on beef, chicken, and fish ever since!

All these recipes came from the same Rick Bayless cookbook: Mexican Everyday. We're obsessed!

Mexican Everyday

Monday, August 17, 2009

Thai Green Curry

You will probably never see made-from-scratch curry paste featured as a 30-minute meal from Rachel Ray. We can live with that. Yes, it takes a long time. But curry paste made at home has a fresh taste you will never get out of a can, or probably at most restaurants. Double the portions and save what remains in the freezer to make your efforts worthwhile. The following entry contains recipes for green curry paste, jasmine rice, and green curry (cooked with meat or vegan style). We've adapted these recipe from a wonderful cookbook called True Thai.

thai spices
Green Curry Paste
Ingredients
1/2 tablespoon whole coriander seeds
1/2 teaspoon whole anise (fennel) seeds
12 whole white peppercorns
2 and 1/2 teaspoons minced fresh Kaffir lime or domestic lime peel
1/3 cup chopped cilantro stems
2 stalks lemon grass. Tough outer leaves discarded, chopped
1/3 cup finely chopped fresh ginger
1/4 cup chopped garlic
1 cup chopped shallots
1/2 cup sliced serrano chilis
6 leaves romaine lettuce (for color)

Instructions
Roast the coriander and anise seeds in a dry pan over medium heat for 5 minutes, until fragrant. Crush with a mortar and pestle (or in a plastic bag with something broad and heavy). Mash the rest of the ingredients in batches in a mortar and pestle to break down the fibers, then blend in a food processor until smooth.

Jasmine Rice
Run cold water over 1 cup of jasmine rice in a mesh strainer until it comes out clear. Mix the rice with about 1.5 cups cold water in a small pot, then bring to a rolling boil. Cover, reduce heat to low, and cook for 18 minutes. Remove from heat and let rest 10-30 minutes.

Green Curry (meat version)
Ingredients
1 cup green curry paste
18 ounces coconut milk
1-2 tablespoons light brown sugar
fish sauce
2 chicken breasts, chopped into bite-sized pieces
2-3 cups vegetables (e.g., green pepper, green beans, japanese eggplant), sliced
handful of thai basil

Instructions
Mix curry paste with the coconut milk in a fairly large pan over medium heat to a low boil. Add the chicken and cook on a low boil for 3 minutes. Add a few dashes of fish sauce and the sugar, and stir until blended. Add the vegetables and cook another 3-4 minutes until they have softened to your liking. Turn off the heat, add plenty of thai basil, and serve over jasmine rice.

Green Curry (vegan version)
Ingredients
1 cup green curry paste
18 ounces coconut milk
1-2 tablespoons light brown sugar
soy sauce
1 box firm tofu, place on a paper towel to let excess water run out, then sliced in to cubes
2-3 cups vegetables (e.g., green pepper, green beans, japanese eggplant), sliced
handful of thai basil

Instructions
Mix curry paste and coconut milk and bring to a low boil over medium heat. Add a few splashes of soy sauce and brown sugar and mix well. Add vegetables and cook to your desired tenderness. Add tofu and mix thoroughly. Turn off heat, add a handful of thai basil and serve over jasmine rice.

Salsa Verde, Two Ways

Roasted tomatillos make a solid base for these two salsas. The first is the most common, and gets a fresh type of heat from raw serrano chilis. Roasted dry chilis give the second version an unusual smoky flavor. Make them both so everyone is happy.

roasted tomatillos

What are tomatillos?
They are like tomatoes, only with a tangy kick. Then can be used raw, but searing mellows them out, and in our opinion, makes a superior salsa. They are encased in their husks, which must be removed prior to use.

Classic Salsa Verde

salsa verde

Ingredients
4 tomatillos
2 cloves garlic, whole
1-2 serrano chilis
1/3 cup cilantro
salt

Instructions
Cut the tomatillos in half. Place the tomatillos (cut side down) and the garlic cloves in a dry pan over medium-high heat. Sear for 4 minutes per side (or until browned). When cooled to room temperature, blend the tomatillos and garlic with the cilantro and chilis in a food processor until smooth. Add salt to taste.

Salsa Verde with Roasted-Dried Arbol Chilis

Dried Arbol Chilis

Ingredients
4 tomatillos
3 cloves garlic, whole
4-8 dried arbol chilis
salt

Instructions
Sear the tomatillos and garlic (see instructions above). Break each chili in half and dump out the seeds, saving the dried skins. Add 2 tablespoons vegetable oil to a frying pan over medium heat. Cook the chili skins in the oil for about a minute, or until darkened. Remove from the heat and let dry on a paper towel.

Blend the dried chilis with the tomatillos and garlic in a food processor. Add salt to taste.

chips and salsa

We found both recipes in Rick Bayless' Mexican Everyday cookbook!

Mexican Everyday


Hickory Smoked Nuts

We cooked these nuts as a snack when a vegan friend (Chris) came to visit. After 20 minutes of smoking over hickory chips, these nuts tasted a lot like bacon. He didn't complain. 

hickory smoked nuts

Ingredients
1 teaspoon light brown sugar
1 teaspoon rosemary, chopped
1/4 teaspoon ground cayenne pepper
2 cup mixed salted nuts (pecans are mandatory, cashews, almonds, etc)
2 teaspoons extra virgin olive oil
2 handfuls hickory wood chips, soaked in water for a couple of hours 

Instructions
Mix the brown sugar, cayenne pepper, and rosemary. Pour the nuts in a 9 x 13-inch heavy-duty foil pan (or any pan coated with foil, as shown below). Add the oil and seasonings and coat the nuts. 


Prepare a two-zone fire for low heat (250 -350 degrees Fahrenheit). Basically, you want to let the coals heat up until they turn gray and move them to one end of the grill. Put the lid on and wait for the temperature to stabilize. Drain the water from the bowl of wood chips and dump one handful on the hot coals. 


When the chips begin to smoke, place the tray of nuts on the grate, away from the coals. Close the lid with the vent holes open over the nuts so the smoke passes over them on the way out. Let the nuts smoke for 10 minutes. Then open the lid, stir the nuts, place another handful of chips on the coals and close the lid for another 10 minutes. Remove the nuts and let cool in the aluminum tray. 


Smoked nuts recipe can be found in the Weber's Charcoal Grilling cookbook that Tim got for Christmas (best present ever?)

Weber's Charcoal Grilling--The Art Of Cooking With Live Fire

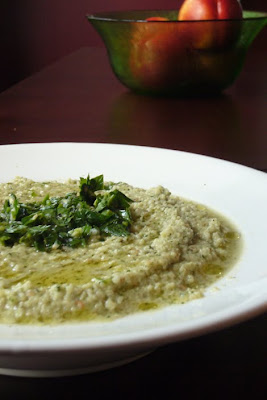
New & Improved Baba Ganoush

Check out the newly updated baba ganoush recipe. We made it again this weekend for Chris, and added some new tips and pictures. We also remembered how yummy this is, and wondered why we don't make it more often!


baba ganoush

Friday, July 31, 2009

Grilled Hamburgers

Do we even need a recipe for hamburgers? Yeah, we do. It isn't hard to make an average burger, but the perfect one is elusive. Like any recipe, some aspects of burger preparation are arbitrary. But there are a few rules. Follow them, pick the toppings of your choice, and you'll never order a burger at a restaurant again.

So what is most important to grilling a good hamburger?
1) Use ground chuck. You won't regret it. If you can, grind your own chuck at home in a food processor.
2) Sear both sides of the meat over high heat, then finish them off slowly away from the flames.
3) Poke a dimple into the middle of each patty before cooking. This prevents the burgers from poofing into balls.

grilled hamburger

Ingredients
1 lb ground chuck
1/2 teaspoon salt
1/3 teaspoon fresh cracked black pepper
Buns
Red onions

Instructions
Mix the meat, salt, and pepper just until they come together. Don't ever do it. Carefully form 1/3 of the meat into a patty. Only compact the meat to the point where it won't fall apart. Use a finger to make a quarter-sized indentation into the center of each patty, about half and inch deep. Keep in mind that the meat will shrink a bit on the grill. Slice some red onion and cover lightly with a tiny bit of olive oil. Just enough to coat the slices.

Prepare a two-zone fire on your grill (basically, all the coals on one side). You will know that the fire is hot when you can only hold your hand above the grate without pain for about 2 seconds. Sear the burgers over the coals for 90 seconds per side, then move to the edge of the coals to finish. 3 minutes per side away from the coals should produce medium doneness, but this is different on every grill. You'll have to experiment on you own. After you move the meat away from the high heat, place the onions directly over the flames for a couple of minutes per side. Then move away from the heat until they are soft enough for you.

Variations
1) Add a slice of cheese on the top of each burger during the last minute or so of cooking.
2) Freeze slices or 1/2 inch cubes of blue cheese for 20 minutes prior to cooking. Insert the frozen slices inside each patty as you form them. The cheese will unfreeze, but won't melt while on the grill. This is called the "Andrew Sweeny Deluxe."
3) Mix in some ancho chili powder with the meat and top the finished burgers with some avocado slices.

PS - Learn how to use hardwood lump charcoal

Wednesday, July 29, 2009

Jerk Chicken Recipe

After trying a few different jerk marinades, we found a clear winner in Weber's Charcoal Grilling--The Art Of Cooking With Live Fire. You can change the proportions as much as you want, but a few things are fundamental: 1) Chili's are your friend, particularly spicy ones like serranos or habaneros 2) Dark meat is the best, especially drumsticks. Don't even think about using breasts. 3) Cook over low and indirect heat. Invest in some applewood chips to mimic the smokey flavor of authentic jerk chicken, which is traditionally cooked over pimento (allspice) branches.

jerk chicken
Ingredients

Marinade
1/2 cup orange juice
1/2 cup lime juice
8-10 scallions, roughly chopped
3 serrano chilis, roughly chopped with seeds.
3 garlic cloves, roughly chopped
2 teaspoons dried thyme leaves, or 1 tablespoon fresh
1 tablespoon ground allspice
1 tablespoon salt
2 teaspoons black pepper
1 teaspoon cinnamon
1 teaspoon dry mustard
1/4 teaspoon freshly grated nutmeg

10 chicken drumsticks
2 large handfuls applewood chips, soaked in water for a couple of hours

Instructions
Combine marinade ingredients in a blender until all the solids are liquified. Remove loose pieces of fat from the chicken. Cut a few slashes into the meat of each drumstick to allow the flavors and smoke to penetrate to the bone. Combine the drumsticks and marinade in a ziplock bag and let marinate in the fridge for at least 8 hours.

Prepare a two-zone charcoal fire for low heat. You won't need to fill your chimney all the way to the top, so perhaps 1/2 way full is ideal. Once the coals are hot, dump them off to the side of your grill so that they take up only 1/3 of the surface area. Close the lid and wait until the internal temperature drops to about 350 degrees fahrenheit. "Low" grilling is generally considered to be between 250 and 350 degrees, so you need to start at a hotter temperature to account for the drop in temperature that will surely occur. Once the temperature has stabilized, drain half of the wood chips and place on top of the coals. When they start to smoke, place the drumsticks skin side down on the grate as far away as possible from the coals. Save the marinade. Close the lid and let them cook for an hour. Place the holes of the lid over the chicken to ensure that the smoke passes over the meat as it exits the grill. Keep an eye on the temperature and add 8 unlit briquettes if the temperature drops to 250 or less.

Bring the remaining marinade to a boil to kill the germs from the raw chicken. Flip the drumsticks over after the first hour is complete. Brush some marinade on both sides. Place the rest of the wood chips on the coals, close the lid, and let them cook over low heat for another hour.

The skin can get a little rubbery from the low temperature cooking, so throw some new coals on the fire after 2 hours of grilling to start a medium-heat fire. Finish off the drumsticks for a couple of minutes per side over the fire to crisp the skin.


We've tried many other recipes from this book and it is GREAT! It is a helpful grilling resource to help build different types of fires, recognize when food is done by sight or touch, and gives ideas of new things to cook on a charcoal grill.
Weber's Charcoal Grilling--The Art Of Cooking With Live Fire

Tuesday, July 28, 2009

Rosemary Focaccia Recipe

This recipe is adapted from a book we recently got as a gift, and are LOVING, called The Art Of Simple Food. The focaccia is easy to make and filled the house with a delicious smell of fresh rosemary.


rosemary foccacia

Ingredients
2 tsp dry yeast
1/2 c lukewarm water
pinch of sugar
3 1/2 c unbleached white flour
1/4 c rye flour
2 T chopped fresh rosemary
1 tsp salt
3/4 c cold water
olive oil
coarse sea salt

Instructions
Stir together yeast & warm water. Add a pinch of sugar. Add 1/4 c white flour & 1/4 c rye flour. Let mixture sit until bubbly for about 30 minutes.

In a seperate bowl, mix 3 1/4 c white flour, rosemary, and salt. Add to bubbly yeast mixture. Add cold water and 1/4 c olive oil. Mix thouroughly by hand or in an electric stand mixer. If mixing by hand, do so on a lightly floured surface for about 5 minutes until dough is soft and elastic. If it is sticky add a small amount of flour (not too much, it should remain very soft). If using a mixture, use the dough hook and knead for 5 minutes until the dough pulls away from the sides of the bowl.

Put the dough in a large bowl and cover with a damp cloth to let rise in a warm place for about 2 hours. It should double in size. We let it rise in a warm oven that we had warmed on the lowest setting and then turned off before putting in the dough.

Once the dough has risen, gently remove it from the bowl and flatten it on a well oiled sheet pan (10" x 15") by gently pressing down from the center out towards the edges. If the dough resists or springs back, let it rest for 10 minutes and then continue shaping. Do not deflate or smash the dough. If you have a pizza peel you can simply flaten the dough on a floured surface instead of a sheet pan and use it to move to the oven.

This is a pizza peel for those who don't already have one:

Pizza Peel Each


Next, put dimples in the dough with your fingers. Like this:

focaccia
Drizzle the dough with olive oil (about 2 T). Cover dough with damp cloth and allow it to rise again for 2 hours, until it is double in size.

While the dough is rising, preheat the oven to 450 (just make sure the dough is not in there!) If you have one, place a pizza stone on the lower rack and let it heat for 30 minutes.

Before baking the bread, sprinkle the dough with 1 tsp coarse sea salt. Put the baking pan or just the dough directly on the pizza stone. Bake focaccia 20-25 minutes until golden and crisp. Remove bread from pan and cool on a wire cooling rack. Best if eaten warm from the oven.

Thursday, July 23, 2009

Popovers

Tim just introduced me to the joys of popovers this year. Can't believe I've lived this long without eating them! The only catch is that you have to buy a special popover pan for this recipe. Buy one, you will not regret it.

popovers
Ingredients
2 eggs
1 c milk
1 T melted butter
1 c flour
1/4 tsp salt

Instructions
Pre-heat oven to 450 degrees, spray popover pan with pam (spray generously).

This is what a popover pan looks like. . . although these popovers look like they were over mixed! Chicago Metallic 6-c. Nonstick Silverstone Popover Pan

Beat 2 eggs until light. Add remaining ingredients. Beat until blended for 30 seconds with an electric beater. Batter should look like heavy cream - do not over beat it or the popovers won't "pop" properly. Similar to the ones in the pan above!

Pour batter into pan so that each cup is 1/3 full. Bake 20 minutes at 450. Reduce heat to 350 and bake 20 more minutes. They will be brown and crusty when done.

Best eaten straight from the oven with butter and honey.

Other recipes you may like:
buttermilk biscuits
cinnamon coffee cake

Cincinnati Chili

There are no Skyline Chili restaurants in Chicago, but there should be. Some might say that Chicago is a hot dog town, and there isn't room for any more meat. We disagree.

Chicago Chili

Ingredients
1 t salt, plus more to taste
1.5 lbs ground beef chuck
2 T vegetable oil
2 onions, chopped fine
2 garlic cloves, minced
2 T chili powder
2 t dried oregano
2 t cocoa
1.5 t ground cinnamon
.5 t cayenne pepper
.5 t allspice
.25 teaspoon ground black pepper
2 C chicken broth
2 C water
2 T cider vinegar
2 t brown sugar
2 C plain tomato sauce

Accompaniments:
Macaroni
Cheddar cheese
Kidney Beans, drained, rinsed, and warmed
White onion, chopped fine
oyster crackers

Instructions
Set a pan over medium heat and add the oil. When it is hot, add the onion and cook until translucent, about 8 minutes. Add the garlic for another minute. Add the meat and cook over low heat until no longer pink.

Some recipes call for the meat to be boiled before cooking the onions. But I don't see the point of this extra step, as long as you cook the meat slowly, making sure not to brown it too much.

Add the chili powder, oregano, cocoa, cinnamon, cayenne, allspice, black pepper, and salt. Mix with the meat for about 30 seconds over medium heat. Stir in the broth, water, vinegar, sugar, and tomato sauce while scraping the bottom of the pan. Increase heat to high. When the liquid boils, reduce to a simmer, about an hour.

Serve over boiled macaroni and top with accompaniments.


Learn about the origins of Cincinnati Chili.

Tuesday, July 21, 2009

Easy Guacamole Recipe

This recipe has been approved by a real Mexican, but probably not as spicy he would have liked. You might want to tweak the ratio of ingredients, but this serves as a good base.

guacamole and chips
Ingredients
4 avocados
1 clove garlic, crushed
1-2 serrano chilis
1/2 cup cilantro, chopped fine
Limes
salt
onion (optional)

Instructions
Pit the avocados and scoop into a large bowl. Save the pit. Add the garlic, chilis (start with 1 to be safe), and some cilantro, and mash with a potato masher until chunky. Squeeze in the juice of one lime and as much salt as you desire, tasting with each addition. Top off with some more cilantro and fresh lime juice. Add a pit or two to prevent oxidation, cover tightly with plastic wrap, and let sit for about 3o minutes.

I prefer 2 chilis, with seeds, but this is usually too spicy for most. One chili is usually enough.

Alternatives: Add half a chopped white onion rinsed under cold water.

Cinnamon Coffee Cake Recipe

Another breakfast recipe from King Arthur Flour. I swear we don't work for them...
This cake has a crunchy cinnamon topping that you'll want to lick off your plate. But I think my favorite part was the filling. I want to try making it with double the filling and half the topping next time.

coffee cake
Ingredients
Streusel topping
1 1/4 cups granulated sugar
1/4 teaspoon salt (if you use unsalted butter)
1 1/2 cups flour
1 T ground cinnamon
6 T melted butter

Filling
1 cup brown sugar, light or dark
1 1/2 tablespoons cinnamon
1 teaspoon unsweetened cocoa powder

Cake
3/4 cup salted butter
1 teaspoon salt
1 1/2 cups granulated sugar
1/3 cup brown sugar
2 1/2 teaspoons baking powder
2 teaspoons vanilla extract
3 eggs
3/4 c plain yogurt
1 1/4 c milk
3 3/4 c flour

Instructions
Preheat the oven to 350°F. Lightly grease a 9" x 13" pan

Make the struesel topping first by mixing together the sugar, salt, flour, and cinnamon. Add the melted butter, stir until combined - it will look crumbly. Save for later.

In a seperate bowl, make the cake filling by mixing together the brown sugar, cinnamon, and cocoa powder.

In a third larger bowl, make the cake. Beat together the butter, salt, sugars, baking powder, and vanilla until well combined and smooth. Add the eggs one at a time, beating well after you add each one.

In a separate bowl (you'll be doing a lot of dishes later), whisk together the yogurt and milk till well combined. Add the flour to the large bowl with butter mixture, and alternate with the milk/yogurt mixture, beating gently to combine.

Spread half the batter into the greased pan, spreading evenly and to the edge. Sprinkle the filling on top of this layer of batter. Then spread the remaining batter on top of the filling. Use a butter knife to gently swirl the filling into the batter. Don't combine filling and batter completely - just swirl the filling through the batter. Sprinkle the bowl of struesel topping over the batter in the pan. Bake the cake 50-60 minutes until golden brown around the edges and a toothpick comes out clean. Let it cool about 20 minutes before serving from the pan.

Friday, July 17, 2009

How to Boil Corn

By popular demand, I am actually going to post a recipe for boiled corn on the site. What started out as an inside joke, has lead to quite a number of searches for the actual recipe. Who am I to argue? Behold, the one recipe everyone has been waiting for!

Ingredients
Corn on the cob
Butter
Salt

Instructions
Fill large stock pot 3/4 full of cold water. Cover and put on stove until boiling. Meanwhile, clean off corn, rinse, and get it ready to cook. Once water is boiling, add the corn and partially cover with lid. Boil for exactly 7 minutes, remove from water, add butter or salt if you want and eat it hot.

The important thing to remember is - do not add salt to the boiling water!

Enjoy! Learn more about how to cook corn.

Our buy this book for more than 170 corn recipes:
Crazy For Corn

Monday, July 13, 2009

Spicy Breakfast Potatoes - Oven Roasted Potatoes

Just made these spicy breakfast potatoes for brunch yesterday, and they were a big hit. You could eat them for any meal really.

Ingredients
2 yukon gold potatoes
olive oil
black pepper
chili powder
garlic powder
Pam cooking spray
Flat leaf parsley
Salt

Instructions
Pre-heat oven to 400 degrees. Spray baking sheet with Pam.

Wash the potatoes and cut them into cubes. Soak cubed potatoes in a bowl of cold water for 5 minutes. Drain and sprinkle with pepper, chili powder, and garlic powder. Spread out potatoes on baking sheet & spray with Pam. Put them in the oven for 10 minutes, flip potatoes or shuffle them around on the pan, and cook for 10 more minutes until crispy on the outside, soft on the inside. Chop up some parsely & sprinkle cooked potatoes with a drizzle of olive oil, salt, and parsely.

We don't have a picture because they were eaten too quickly!

Other recipes you may like:
blueberry pancake recipe
potato and leek soup

Friday, June 19, 2009

Champagne Risotto with Scallops

As if risotto isn't decadent enough, substituting champagne for the usual white wine really pushes this one over the edge. So if you ever find yourself reincarnated as the chef for the Medici family in Renaissance Florence, you know what to make.

scallop risotto
Ingredients
2 T butter
1/4 cup chopped green onions
1 cup arborio rice1 cup champagne
chicken broth (usually several cups)
1/4 lb. scallops
1/2 c freshly grated parmesan (probably more)

Instructions
Put the chicken broth in a sauce pan and heat over medium/low heat. Meanwhile, saute onions in melted butter for about 3 minutes, add rice and cook in butter for about 2 minutes until opaque, add 1 c champagne and simmer rice until liquid is almost gone. Add 1 c of the hot broth to rice pan and stir rice until liquid is absorbed. Continue until the rice is chewy. Add cheese. For more detailed instructions, see this recipe for 3 cheese risotto.

Sear the scallops just before the risotto is done. The most important things to keep in mind when searing scallops are (1) use a very hot, non-stick pan, and (2) make sure the scallops are dry before searing. If the pan is not hot enough, the scallops will release water and never obtain the perfect sear. So pat your scallops dry with a paper towel while the pan heats up. Place about 1/2 a tablespoon of butter in the pan as it heats, and add the scallops when the pan is almost smoking hot. Do not crowd the pan, which is another enemy of a good sear. We usually sear bay scallops for a only 30 seconds per side (sear sea scallops about 1 minute per side). Just keep an eye on them and flip them when they have a golden brown crust. If you have to sear them in two batches, wipe down the pan with a paper towel between batches, add new butter, and start over.

Served the seared scallops over the finished risotto with a generous dusting of parmesan and chopped parsley.

Scallops 101
We used bay scallops here, but sea scallops are more common, larger, and would perhaps be easier to sear. In fact, we haven't seen any recipes for seared bay scallops, but thought we would give it a try. Sea scallops are usually about two inches long and 1.5 inches thick, whereas bay scallops are much smaller. Calico scallops are often sold as 'bay scallops,' but can be detected by their opaque appearance around the edges. Apparently, they lose their natural flavor when shucked so be careful not to get ripped off.

Other recipes you may like:
3 cheese risotto recipe
shrimp scampi recipe

Thursday, June 18, 2009

Blueberry Pancakes

I'm really into brunch food at the moment - why not try brunch for dinner tonight? These pancakes are light and delicious. I found the recipe on King Arthur Flour, my go-to spot for any breakfast food recipe. Use fresh or frozen blueberries.

Ingredients
2 large eggs
1 1/4 cups (10 ounces) milk
2 teaspoons vanilla extract, optional
3 tablespoons (1 1/2 ounces) melted butter or vegetable oil (1 1/4ounces)
1 1/2 cups (6 1/4 ounces) King Arthur Unbleached All-Purpose Flour
3/4 teaspoon salt
2 teaspoons baking powder
2 tablespoons (7/8 ounce) sugar
3/4 cup (3 ounces) blueberries, fresh or frozen

Instructions
Beat the eggs, milk, and vanilla until light and foamy, about 3 minutes at high speed with a hand mixer. Stir in the melted butter or oil. The key is to use an electric mixer instead of doing it by hand! Add the flour, salt, baking powder, and sugar, stirring just to combine, there will be a few lumps still. Set the batter aside to rest while you're heating your pan.

Heat a large frying pan over medium-low to medium heat. Spray with Pam. The pan is hot enough when a drop of water evaporates immediately on contact.

Drop the pancake batter by 1/4 cupfuls onto the hot pan and sprinkle 1 tablespoon blueberries on each pancake. Cook until they’re golden brown on the bottom, about 2 minutes. Flip them over, and cook till the other side is golden, 2 to 2 1/2 minutes.

Serve the pancakes immediately or transfer them to a platter, cover, and keep warm in a 200°F oven.

Other recipes you may like:
French toast
chocolate chunk oatmeal cookies

View all breakfast recipes

Sunday, April 19, 2009

Tuscan Beef and Pepper Stew

This recipe is from Simply Tuscan, by Pino Luongo. Also known as Peposo (from the large amount of black pepper), this stew is worth the effort.

Ingredients
1/2 cup extra virgin olive oil
2 pounds beef stewing meat
2/3 cup finely chopped carrot
2/3 cup finely chopped onion
2/3 cup finely chopped celery
salt to taste
2 cups red wine
3 cups chicken stock
1/3 cup tomato sauce
1 pound butternut squash, peeled, seeded, and cut into 1-inch cubes (about 3 cups)
2 T crushed black peppercorns

Instructions
In a heavy casserole over high heat, warm half of the oil. Add the beef and sear it on all sides until dark brown. Keep some spacing between the cubes to prevent them from steaming. You won't be able to sear all the beef at once, so do it in batches. Set the beef aside when done.

Reduce the heat to low and add the remaining oil to the casserole. Add the carrot, onion, and celery, and some salt. Mix the seared beef with the vegetables and cook for about 2 minutes. Add the red wine and scrape the browned beef from the bottom of the pan. This is critical for developing the flavor. Cook for about 10 minutes, or until some of the liquid appears to have evaporated. Add the stock and the tomato sauce and cook for 15 minutes more. Add half of the squash and all the peppercorns. The original recipe calls for 4 T peppercorns, which seemed overpowering. You may even want to use less than 2 T. Bring to a boil, cover, reduce heat to low, and simmer for at least an hour. Keep the lid slightly open if you want some of the water to evaporate. When the meat is tender, add the rest of the squash and cook until tender, about 20 minutes. Add salt if you wish.

This stew is excellent served over creamy polenta!

Tuesday, April 14, 2009

World's Best French Toast

We made this french toast for Easter brunch and thought we died and went to heaven! But seriously, this is undoubtedly the best french toast I've ever had. It wasn't mushy or eggy like other recipes we've tried. The key is keeping toast in the oven until it is ready to serve. Eat it with syrup or powdered sugar and sliced fruit. The only thing we were missing was some crispy bacon.

World's Best French Toast
Ingredients
6 to 8 slices challah bread, sliced 1 inch thick
3 large eggs
3/4 cup 2% milk
pinch of salt
1/4 teaspoon nutmeg
2 tablespoons sugar
2 tablespoons rum
1 teaspoon vanilla
1 T butter
1 T vegetable oil

Instructions
Pre-heat the oven to 400 degrees. Get out a baking sheet and set aside.

Put the butter & vegetable oil in a large frying pan and turn on medium heat. Let the butter melt while you prepare the other ingredients.

In a small bowl, whisk all remaining ingredients together until smooth (not foamy). Pour the batter into a shallow dish or cake pan large enough for 2 slices of bread.

Put 2 pieces of bread in the batter and let them soak for 30 seconds per side. Place the bread on the frying pan and cook toast for 2 minutes per side. The bread should be golden brown, not dark. Put the bread on the baking sheet & into the pre-heated oven. Cook the remaining slices of bread in the same way, and remove all pieces from oven once ready to serve.

The bread will get a tiny bit more brown in the oven, so be aware of this as you are frying it up.

Dig in! Don't worry, you'll be forgiven for enjoying this sinful dish.

Saturday, March 28, 2009

Homemade Pasta with Sage Butter

So simple! The brown butter gets kind of caramelized and mixes with the sage perfectly.

homemade pasta

Ingredients for Pasta (tagliatelle is best)
1 2/3 c flour, plus more for sprinkling on counter
3 eggs

Ingredients for Sauce
1 stick salted butter
6-8 sage leaves, minced

Instructions for pasta
Refer to homemade pasta recipe.

Instructions for sage butter sauce
When you've gotten the pasta dough ready & into the fridge, begin boiling your pasta water. Then in a large sauce pan melt the butter on low heat until browned, not burnt. It will begin to smell like caramel corn. Keep the butter over very low heat while you cut pasta. When you add the pasta to boiling water, add the minced sage to your brown butter. It will get a little crispy.


Once the pasta is cooked, put it in a large bowl and pour the butter sauce over it. Toss lightly. Makes enough for 4.

Thursday, March 26, 2009

French Onion Soup


A quick version of French Onion Soup you can make during the week. This recipe makes about 4 bowls of soup.

Ingredients
3 tablespoons olive oil
2 large Vidalia onions, sliced
1/2 teaspoon kosher salt
1/2 teaspoon freshly ground black pepper
1 teaspoon fresh thyme leaves
4 cups beef broth
4 slices ciabatta bread, cubed
4 slices fontina cheese

Equipment
4 (1 1/2-cup) ovenproof ramekins

Instructions
Heat the olive oil over medium heat in a medium-sized sauce pan. Add the onions, salt, and pepper. Cook, stirring occasionally, until the onions become tender (about 10 minutes). Add the thyme and beef broth. Simmer, uncovered, until the onions are soft (about 15 minutes).

Divide the soup between the 4 ovenproof ramekins - or just do 2 and save the rest of the soup for tomorrow. Divide the cubed bread among the ramekins. Top each with a slice of fontina cheese. Place under the broiler, until the cheese is golden and bubbly (about 4 minutes).

Tuesday, February 17, 2009

Rosemary and Parmesan Buttermilk Biscuits

So.Good.

parmesan buttermilk biscuits
Ingredients
2 cups unbleached all-purpose flour (10 ounces)
2 teaspoons baking powder
1/2 teaspoon baking soda
1 teaspoon sugar
3/4 teaspoon table salt
3/4 cup grated Parmesan cheese (1 1/2 ounces)
1/2 teaspoon chopped fresh rosemary
1 cup buttermilk (cold)
8 tablespoons unsalted butter , melted and cooled slightly (about 5 minutes), plus 2 tablespoons melted butter for brushing biscuits

Instructions
1. Adjust oven rack to middle position and heat oven to 475 degrees. Whisk flour, baking powder, baking soda, sugar, salt, Parmesan, and rosemary in large bowl. Combine buttermilk and 8 tablespoons melted butter in medium bowl, stirring until butter forms small clumps (see photo below).

2. Add buttermilk mixture to dry ingredients and stir with rubber spatula until just incorporated and batter pulls away from sides of bowl. Using greased 1/4-cup dry measure, scoop level amount of batter and drop onto parchment-lined rimmed baking sheet (biscuits should measure about 2 1/4 inches in diameter and 1 1/4 inches high - there will be about 12). Repeat with remaining batter, spacing biscuits about 1 1/2 inches apart. Bake until tops are golden brown and crisp, 12 to 14 minutes.

3. Brush biscuit tops with remaining 2 tablespoons melted butter. Transfer to wire rack and let cool 5 minutes before serving.


4. Have a heart attack
Related Posts Plugin for WordPress, Blogger...